| Prep Time: 20 minutes | Cook Time: 10 minutes | Total Time: 30 minutes | Serves: 12 |
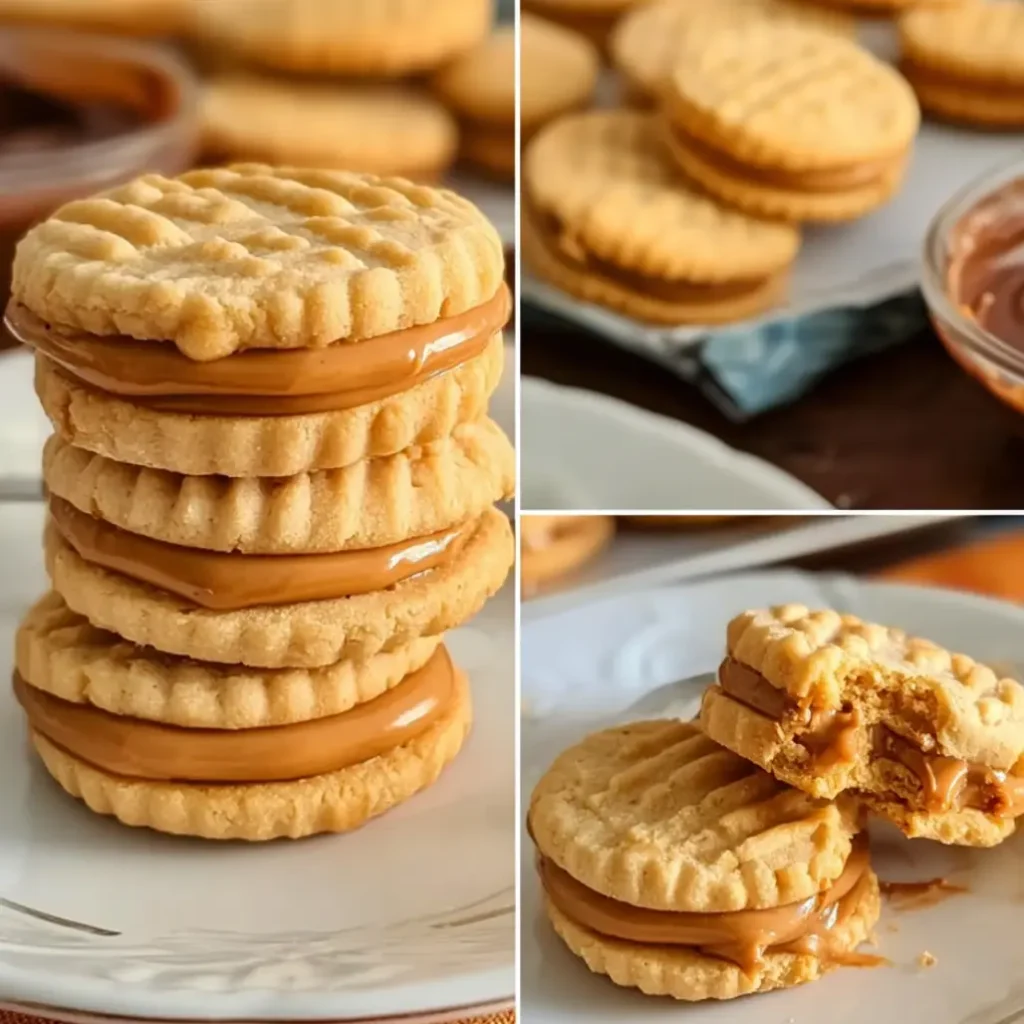
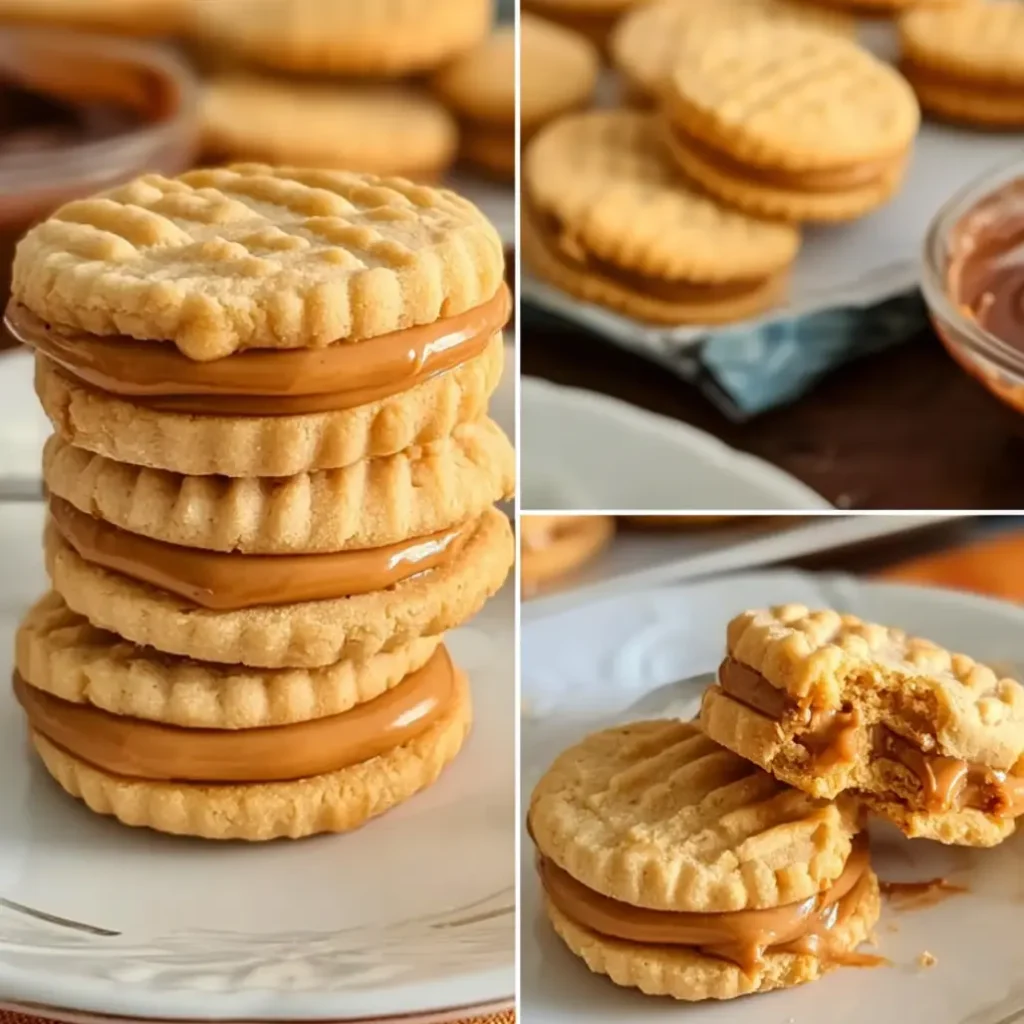
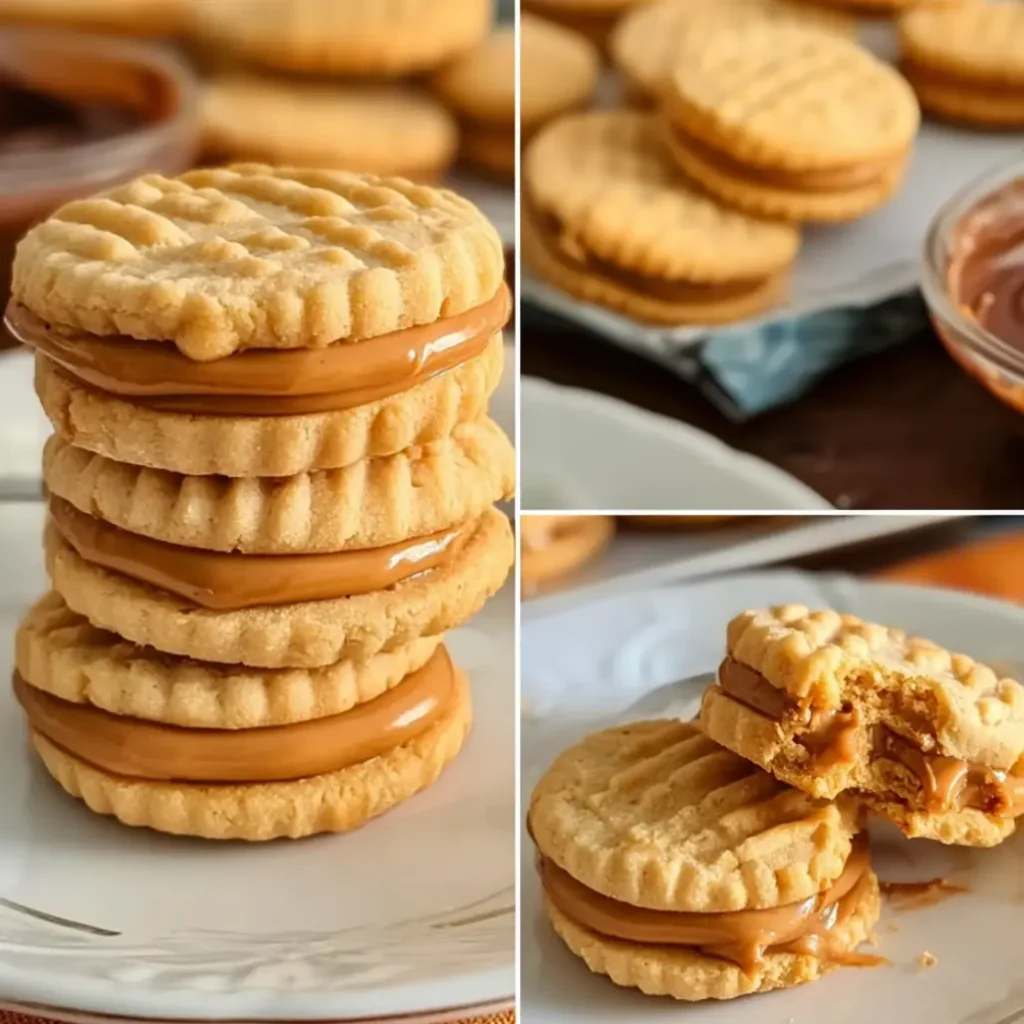
There’s something undeniably magical about recreating childhood favorites in your own kitchen, and these homemade nutter butter cookies deliver that nostalgic satisfaction with every single bite. These delightfully soft peanut butter sandwich cookies combine the perfect balance of sweet and salty flavors because they’re crafted with premium ingredients and genuine care, creating a homemade version that surpasses any store-bought alternative you’ve ever tasted.
Why These Homemade Nutter Butter Cookies Will Transform Your Baking Experience
The beauty of making homemade nutter butter cookies lies in the incredible control you have over every element of the recipe because you can adjust sweetness levels, texture preferences, and even customize the filling to match your family’s exact taste preferences. Unlike commercial versions that rely heavily on preservatives and artificial flavors, these cookies showcase the pure essence of roasted peanuts combined with creamy butter and perfectly balanced sweetness because every ingredient serves a specific purpose in creating the ultimate cookie experience.
These cookies offer an exceptional texture profile that’s simultaneously tender and satisfying because the dough recipe incorporates both granulated and brown sugars, creating depth of flavor while maintaining the perfect moisture content. The filling component elevates these treats to restaurant-quality status because it combines smooth peanut butter with powdered sugar and just enough cream to achieve that signature spreadable consistency that makes each bite absolutely irresistible.
Essential Ingredients for Perfect Homemade Nutter Butter Cookies
For the Cookie Base:
- 1/2 cup unsalted butter, softened to room temperature
- 1/2 cup creamy peanut butter (use quality brand for best results)
- 1/2 cup granulated sugar, plus extra for sprinkling
- 1/2 cup packed brown sugar
- 1 large egg, room temperature
- 1 teaspoon pure vanilla extract
- 1 1/4 cups all-purpose flour, sifted
- 3/4 teaspoon baking soda
- 1/4 teaspoon fine sea salt
For the Signature Filling:
- 1/2 cup creamy peanut butter
- 1/4 cup unsalted butter, softened
- 1 cup powdered sugar, sifted
- 1 teaspoon vanilla extract
- 1-2 tablespoons whole milk as needed
The Art of Creating Restaurant-Quality Homemade Nutter Butter Cookies
Creating exceptional homemade nutter butter cookies requires understanding the science behind each ingredient interaction because successful cookie making depends on proper technique, timing, and attention to detail. The creaming process becomes absolutely crucial because properly incorporating air into the butter and sugar mixture creates the foundation for the cookies’ tender crumb structure while ensuring even distribution of flavors throughout each batch.
Temperature control plays a vital role in achieving consistent results because ingredients at room temperature blend more easily, creating a smoother dough that bakes evenly and produces cookies with uniform texture and appearance. The shaping technique also contributes significantly to the final product because creating those signature oval shapes and crosshatch patterns not only provides visual appeal but also helps the cookies bake uniformly while maintaining their distinctive appearance.
Step-by-Step Instructions for Flawless Results
Step 1: Prepare Your Baking Environment
Preheat your oven to 350°F (175°C) and line two large baking sheets with high-quality parchment paper because proper preparation ensures even baking and prevents sticking while making cleanup significantly easier after your baking session.
Professional Tip: Allow your oven to preheat for at least 15 minutes to ensure even temperature distribution, which prevents hot spots that could cause uneven browning of your homemade nutter butter cookies.
Key Points: Use light-colored baking sheets for even browning, ensure parchment paper lies flat without wrinkles, and position oven racks in the center for optimal heat circulation.
Step 2: Create the Perfect Cookie Dough Base
In a large mixing bowl, cream together the softened butter, peanut butter, granulated sugar, and brown sugar using an electric mixer on medium speed for 3-4 minutes because this extended creaming time incorporates maximum air into the mixture, resulting in lighter, more tender homemade nutter butter cookies.
Professional Tip: The mixture should appear noticeably lighter in color and significantly increased in volume when properly creamed, indicating that sufficient air has been incorporated into the base.
Key Points: Stop and scrape bowl sides every minute, ensure butter is properly softened but not melted, and maintain consistent mixing speed throughout the process.
Step 3: Incorporate Binding Ingredients
Add the room-temperature egg and vanilla extract to the creamed mixture, beating on medium speed until completely incorporated because proper binding ensures uniform texture and prevents ingredient separation during the baking process.
Professional Tip: Room-temperature eggs emulsify more readily with the butter mixture, creating a smoother, more cohesive dough that produces superior homemade nutter butter cookies.
Key Points: Beat just until combined to avoid overworking the dough, ensure no streaks of egg remain visible, and scrape bowl thoroughly between additions.
Step 4: Combine Dry Ingredients
In a separate bowl, whisk together the sifted flour, baking soda, and salt until evenly distributed because proper dry ingredient preparation prevents pockets of leavening agents that could cause uneven rising in your homemade nutter butter cookies.
Professional Tip: Sifting flour removes lumps and aerates the ingredient, contributing to a more tender final texture in your finished cookies.
Key Points: Measure flour using the spoon-and-level method for accuracy, whisk thoroughly to eliminate streaks, and add gradually to wet ingredients.
Step 5: Form the Final Dough
Gradually add the flour mixture to the wet ingredients, mixing on low speed just until a cohesive dough forms because overmixing develops gluten strands that can create tough, chewy cookies instead of the desired tender texture.
Professional Tip: Stop mixing as soon as the last traces of flour disappear to maintain the perfect texture balance in your homemade nutter butter cookies.
Key Points: Add flour in three additions for easier incorporation, use lowest mixer speed to prevent flour clouds, and finish mixing by hand if necessary.
Step 6: Shape and Pattern the Cookies
Roll the dough into 1-inch balls, then gently shape each into an oval approximately 2 inches long because this traditional shape mimics the classic cookie appearance while providing optimal surface area for the signature crosshatch pattern.
Professional Tip: Lightly flour your hands if the dough becomes sticky, and work quickly to prevent the dough from warming up too much during shaping.
Key Points: Maintain consistent sizing for even baking, space cookies 2 inches apart on baking sheets, and press fork patterns gently but firmly.
Step 7: Add Finishing Touches
Using a fork, press each shaped cookie in a crosshatch pattern, then lightly sprinkle with granulated sugar because this classic technique not only creates the iconic appearance but also adds textural contrast and extra sweetness to your homemade nutter butter cookies.
Professional Tip: Clean your fork between cookies to prevent dough buildup that could affect the pattern clarity and overall appearance.
Key Points: Press patterns to about halfway through the cookie thickness, ensure consistent pressure for uniform appearance, and avoid over-sprinkling sugar.
Step 8: Bake to Perfection
Bake for 8-10 minutes until the edges are just set and lightly golden because overbaking results in dry, hard cookies instead of the desired soft, chewy texture that makes homemade nutter butter cookies so irresistible.
Professional Tip: Cookies will appear slightly underbaked when removed from the oven but will continue cooking on the hot baking sheet during the cooling process.
Key Points: Rotate baking sheets halfway through for even browning, watch carefully during final minutes, and remove when centers still appear soft.
Step 9: Cool Properly
Allow cookies to cool on the baking sheet for 5 minutes before transferring to a wire cooling rack because this brief resting period prevents breaking while ensuring the cookies maintain their shape during the transfer process.
Professional Tip: Completely cooled cookies are essential for successful filling application because warm cookies will melt the filling and create a messy assembly process.
Key Points: Use a thin spatula for transfer, ensure complete cooling before filling, and handle gently to prevent breakage.
Step 10: Prepare the Signature Filling
Beat together peanut butter and softened butter until smooth and creamy, then gradually add powdered sugar and vanilla extract because proper mixing technique ensures a silky, spreadable consistency that complements the cookie texture perfectly.
Professional Tip: Add milk one tablespoon at a time until the filling reaches your preferred consistency, keeping in mind that it will firm up slightly when assembled.
Key Points: Start with less liquid and add as needed, beat until completely smooth, and taste for sweetness balance.
Step 11: Assemble Your Masterpieces
Spread or pipe approximately 1 tablespoon of filling onto the flat side of one cookie, then gently press another cookie on top because proper assembly technique ensures even filling distribution and prevents squeezing out the sides.
Professional Tip: Twist the top cookie slightly as you press to help seal the edges and prevent the filling from separating during storage.
Key Points: Use consistent filling amounts for uniform appearance, press gently to avoid cracking, and clean excess filling immediately.
Professional Tips for Exceptional Results
Achieving bakery-quality homemade nutter butter cookies requires attention to several critical factors that significantly impact the final outcome. Temperature management becomes essential because ingredients at consistent room temperature blend more effectively, creating smoother doughs and more uniform textures throughout the baking process.
Measuring accuracy cannot be overstated because baking operates as a precise science where ingredient ratios directly affect texture, flavor, and structure. Using a kitchen scale for dry ingredients eliminates variables that could compromise your results, while proper measuring techniques for liquid ingredients ensure consistent outcomes every time you make this recipe.
Storage techniques also play crucial roles in maintaining optimal texture and flavor because properly stored homemade nutter butter cookies retain their soft, chewy characteristics while preventing the filling from becoming too firm or separating from the cookie layers.
Creative Variations to Customize Your Experience
Chocolate-Enhanced Version
Transform your homemade nutter butter cookies by dipping half of each assembled sandwich in melted dark chocolate because this addition creates an elegant presentation while adding rich cocoa notes that complement the peanut butter flavors beautifully.
Crunchy Texture Alternative
Substitute chunky peanut butter for smooth varieties in both the cookie dough and filling because this modification introduces delightful textural contrast while intensifying the overall peanut flavor profile throughout each bite.
Mini Cookie Option
Create bite-sized versions by rolling smaller dough balls and reducing baking time slightly because these adorable mini homemade nutter butter cookies make perfect party treats or lunchbox additions for children and adults alike.
Seasonal Spice Blend
Incorporate 1/4 teaspoon of cinnamon and a pinch of nutmeg into the dry ingredients because these warm spices add complexity and seasonal appeal while complementing the nutty flavors already present in the recipe.
Perfect Pairing Ideas for Complete Enjoyment
These homemade nutter butter cookies pair exceptionally well with cold milk, creating the classic combination that brings out the best in both the cookie texture and creamy filling. Consider serving alongside fresh fruit selections from https://tastymiddles.com/category/salads/ because the bright acidity of berries provides a refreshing contrast to the rich, nutty flavors.
For special occasions, pair these cookies with coffee-based beverages or explore complementary options from https://solushrecipes.com/category/refreshing-beverages/ because the caffeine enhances the cookie’s sweet notes while providing an adult-friendly accompaniment that elevates the entire experience.
Discover More Delicious Treats
Expand your baking repertoire by exploring additional treat options at https://tastymiddles.com/category/snacks-appetizers/ where you’ll find complementary recipes that pair beautifully with these homemade nutter butter cookies for entertaining or everyday enjoyment.
Consider creating themed dessert spreads by incorporating selections from https://tastymiddles.com/category/dessert-recipes/ because variety enhances any gathering while showcasing your baking skills across multiple categories and flavor profiles.
For breakfast-inspired treats, browse https://recipes.galovi.com/category/breakfast/ where you’ll discover morning-appropriate variations that incorporate similar techniques and flavor combinations in family-friendly formats.
Storage Guidelines for Maximum Freshness
Proper storage ensures your homemade nutter butter cookies maintain their optimal texture and flavor for extended periods. Store assembled cookies in airtight containers at room temperature for up to 5 days because this method preserves the soft cookie texture while preventing the filling from becoming too firm.
For longer storage, refrigerate assembled cookies for up to 2 weeks, allowing them to return to room temperature before serving because chilled cookies offer firmer texture while maintaining flavor integrity throughout the storage period.
Freezing options include both assembled cookies and cookie dough portions because this flexibility allows you to prepare ahead for special occasions or maintain a ready supply of homemade treats for unexpected guests or family cravings.
The Science Behind Perfect Cookie Texture
Understanding the role of each ingredient helps explain why these homemade nutter butter cookies achieve their characteristic texture and flavor profile. The combination of granulated and brown sugars creates both immediate sweetness and complex molasses notes because brown sugar contains moisture that contributes to the soft, chewy texture everyone loves.
Peanut butter serves dual purposes as both flavoring agent and fat source because its natural oils contribute to tenderness while providing the signature taste that defines these beloved cookies. The protein content in peanut butter also affects browning reactions during baking, creating those beautiful golden edges that signal doneness.
Baking soda functions as the primary leavening agent because it reacts with acidic components in the dough to create lift and tenderness, while the small amount of salt enhances all other flavors and balances the overall sweetness profile.
Troubleshooting Common Issues
If your homemade nutter butter cookies spread too much during baking, the likely cause involves either too-warm butter or insufficient flour in the dough mixture. Chilling the shaped cookies for 15 minutes before baking often resolves spreading issues because firmer dough maintains its shape better under oven heat.
Dry or crumbly texture typically results from overbaking or insufficient fat content because these cookies rely on proper moisture balance to achieve their characteristic soft, chewy consistency. Monitor baking times carefully and ensure accurate ingredient measurements to prevent this issue.
Filling that’s too stiff or too runny can be adjusted by modifying the milk content because achieving the perfect consistency requires balancing the liquid ingredients with the powdered sugar and peanut butter base until spreadable but not loose.
Additional Inspiration for Your Baking Journey
Explore complementary dinner options at https://recipes.galovi.com/category/dinner-recipes/ where you’ll find meal ideas that balance rich desserts like these homemade nutter butter cookies with lighter main courses for complete menu planning.
Consider incorporating elements from https://recipes.galovi.com/category/salads/ into your meal planning because fresh, crisp salads provide excellent contrast to rich, sweet treats while ensuring balanced nutrition throughout your day.
For entertaining purposes, explore https://solushrecipes.com/category/savory-sides/ to discover appetizers and side dishes that complement dessert offerings because well-planned menus enhance guest satisfaction while showcasing your culinary versatility.
Creative sauce and dip options from https://solushrecipes.com/category/flavored-dips-marinades/ can inspire unique cookie presentations or provide ideas for fruit accompaniments that pair beautifully with these nutty, sweet treats.
Conclusion
These homemade nutter butter cookies represent the perfect intersection of nostalgia and culinary craftsmanship because they honor the beloved original while elevating every element through fresh ingredients and careful technique. The satisfaction of creating these treats from scratch extends beyond simple baking because you’re crafting memories, sharing love, and developing skills that will serve you throughout your culinary journey.
Whether you’re preparing these cookies for special occasions, everyday enjoyment, or sharing with loved ones, the care and attention you invest in each step shows in every delicious bite. The beauty of homemade nutter butter cookies lies not just in their exceptional taste but in the joy they bring to both baker and recipient, creating connections and moments that store-bought alternatives simply cannot match.
https://recipes.galovi.com/category/salads/ into your meal planning because fresh, crisp salads provide excellent contrast to rich, sweet treats while ensuring balanced nutrition throughout your day.
For entertaining purposes, explore https://solushrecipes.com/category/savory-sides/ to discover appetizers and side dishes that complement dessert offerings because well-planned menus enhance guest satisfaction while showcasing your culinary versatility.
Creative sauce and dip options from https://solushrecipes.com/category/flavored-dips-marinades/ can inspire unique cookie presentations or provide ideas for fruit accompaniments that pair beautifully with these nutty, sweet treats.

